Sunday, November 24, 2013
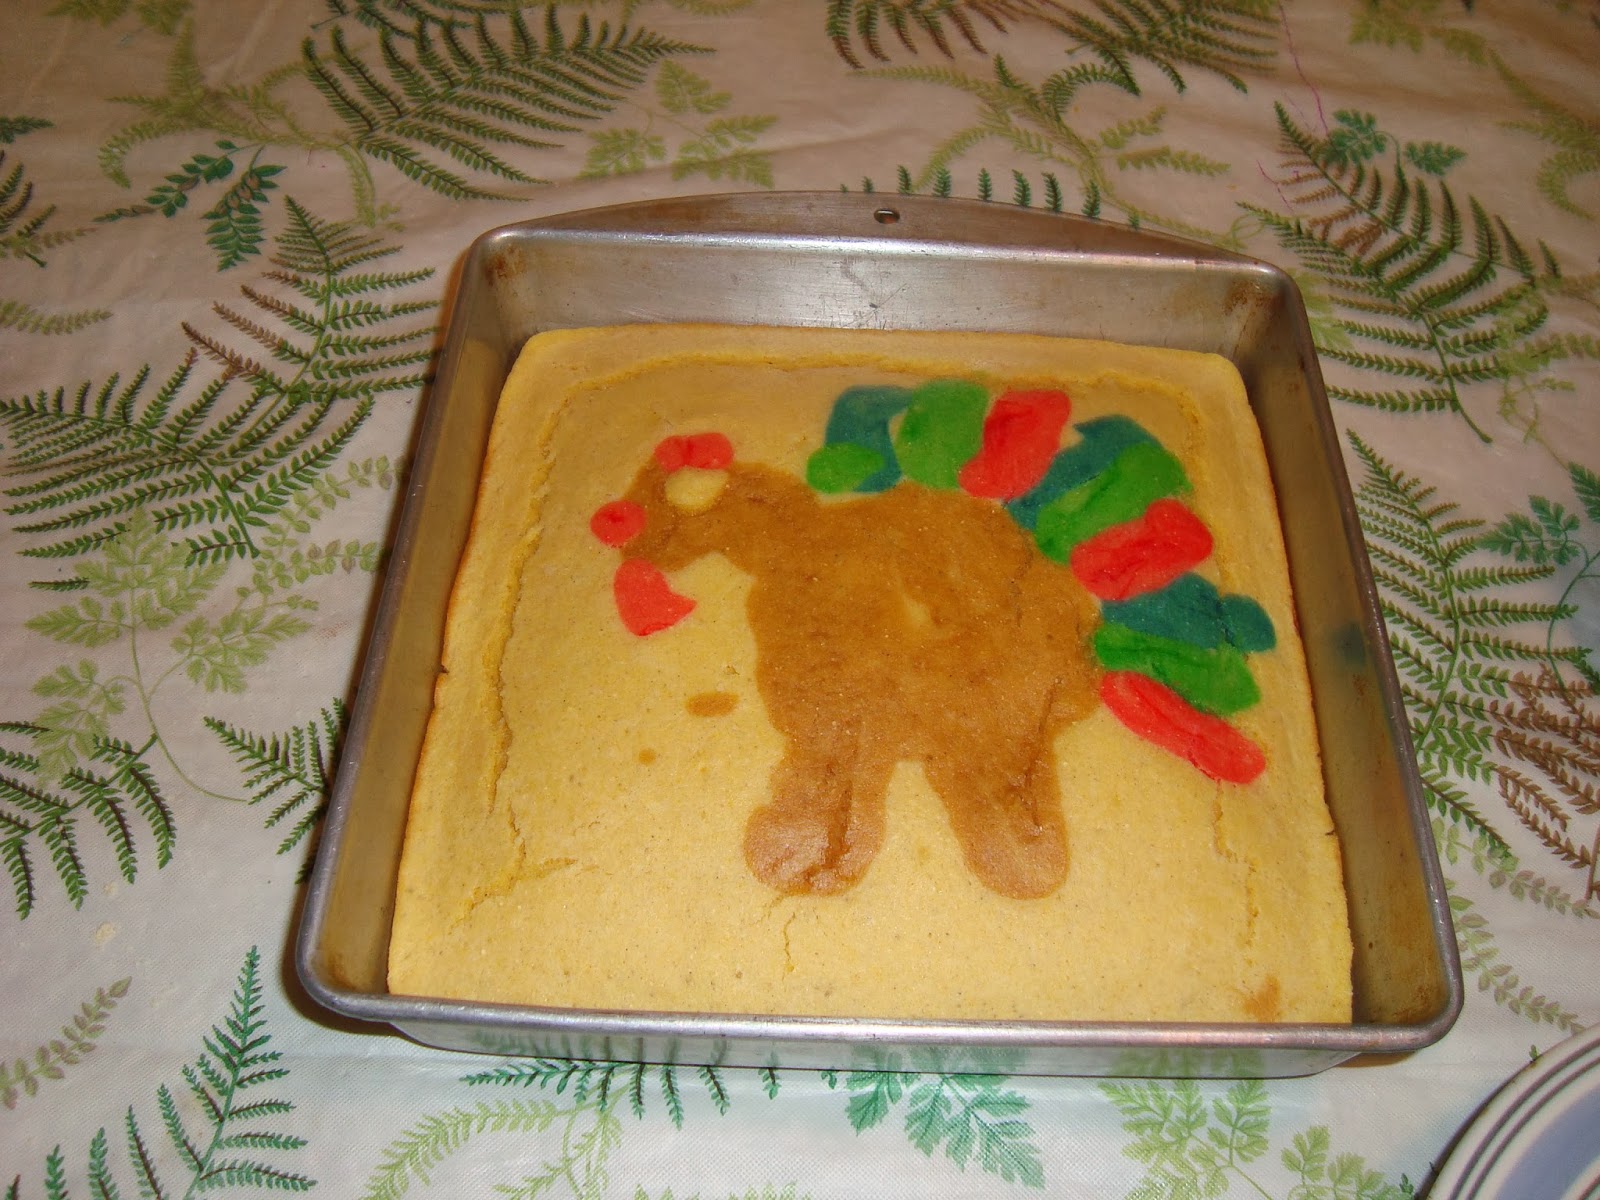
Thanksgiving Turkey Cornbread
Colored cornbread just like Dad used to make. We covered it with foil after it baked awhile so the colors would stay bright instead of turning golden brown.


Tuesday, November 12, 2013
Scripture Power
He likes singing time no matter what we sing, but "Scripture Power" seems to be one of his favorites. We noticed last time we sang it that he tried to do the actions. So cute!
Thursday, November 7, 2013
Halloween 2013
 Making a train out of the diaper box, it was just the right size for a four year old. The face is the lid off a take out container. The hat was $2.50 at the party store. I used two sheets of blue poster board and 1 sheet of red. Thank goodness it didn't rain like last year since I never got around to waterproofing it in any way. I tried to make this costume as lightweight as possible, but it was still a bit heavy by the end of the day.


 We grew huge pumpkins this year! Three were too big to carry.
 Flower princess
 Pippi Longstocking
 My enderman kid is in the back of this picture.
Tuesday, October 15, 2013
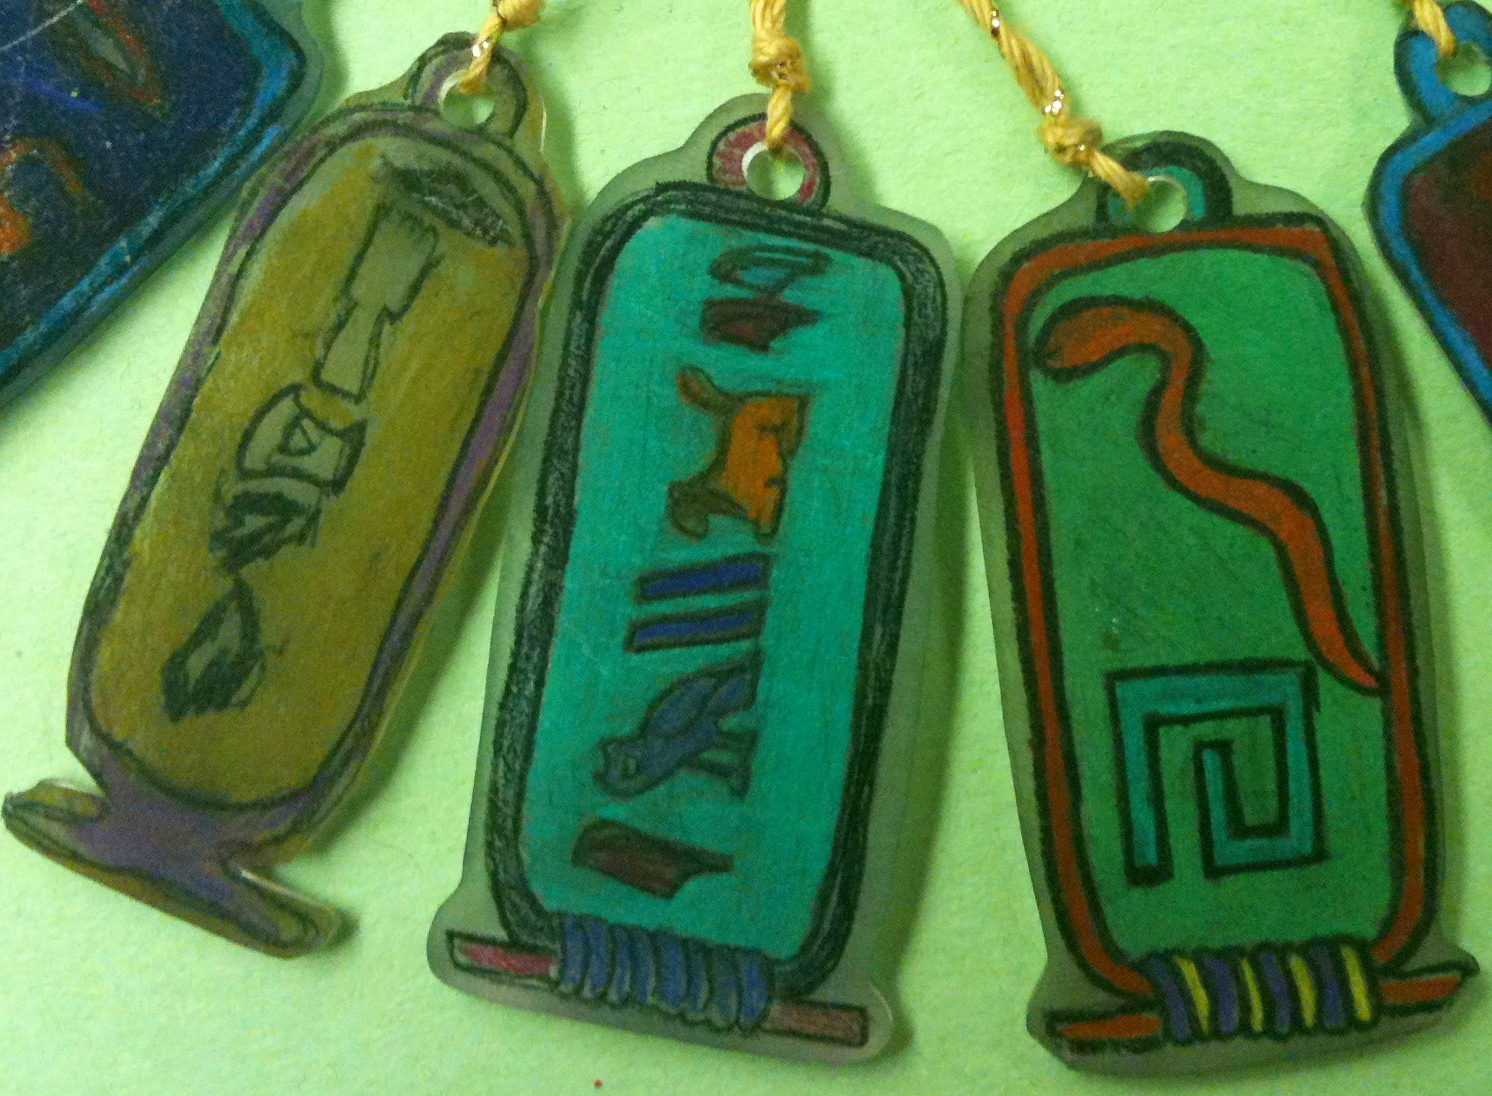
Girl Scout Jeweler: Name pendant from Egypt
For girl scouts my daughter was supposed to create jewelry inspired by another culture. She decided to make a cartouche necklace. We used the lid from a salad at Costa Vida (yum!). The plastic should be have the #6 recycle symbol. She printed out a picture of her name online at virtual-egypt.com (5 1/2 inches tall) and then traced it onto the plastic lid with permanent markers. She cut it out and punched a hole in it. Then we put it the oven at 350 for 2-3 minutes. Until it was done curling and flat again. Then voila, a cool egyptian name pendant!


Note: I used a screen shot to get a printable copy from this cartouche maker website. Or you could just free hand a traceable alphabet. You can have one name cartouche ready for each girl making a pendant to make things easier. My daughter embellished the edges of the cartouche with curly cues and dots which was fun and cute. The rings and tools to attach the pendants to a chain or rope are in the beading section of any craft store.
Update: #6 plastic is hard to find. You can order shrinky dink refills and use the melting instructions supplied or try the dollar store jiffy foil baking pans with plastic lids, for each pan you will get a 7"x11" sheet allowing you to make four 3.5"x5.5" sheets. This isn't a perfect solution, because the plastic melts differently than shrinky dink film. After a lot of experimentation we found that 300 degrees for about 5+ minutes got the pendants past the horribly wrinkly, curled state and back to flat. At hotter temperatures they melted too quickly and curled too much to eventually flatten out. I would definitely practice this once before the girls do it.
Here is another blog about cartouche pendants
Go to the blog Adventures in middle school art
Monday, September 30, 2013
High Altitude Gluten Free Bread Recipe

A really good gluten free loaf tested at high altitude! Uses whatever kind of flour you have on hand.
I've tested this about ten times with a lot of different flour combinations. It makes a nice, light, soft bread that keeps well and is good for sandwiches or toast. It doesn't cave in much after baking like most of the other recipes I've tried, or the Cosco gluten free bread. I use the flour ratio from this recipe as my all-purpose gluten free flour mix. I get ideas for flour combinations by either looking at recipes online for gluten free bread or by what I have in my pantry that needs to be used up. I've considered just trying to make the most cost efficient loaf my staple, but experimenting is just too much fun. The inspiration for this recipe comes from here. Notice from the pictures below that you can make a "white bread" by using rice, oats, amaranth, and millet. You get a more "whole grain" flavor by using sorghum and brown teff.
In a small bowl mix:
1 cup really warm water
2 1/4 tsp SAF instant yeast
1 tsp sugar
In a large bowl mix:
*240g of whole grain flour, a combination of 3-4 flours (rice, brown rice, millet, brown or gold teff, quinoa, toasted quinoa, sorghum, sweet sorghum, amaranth, oat, etc. If using a bean or garbanzo flour use 30-40g or less. Bean flour is always a good idea for the protein and fiber, but you sacrifice a bit on texture.)
*125g of starch (tapioca, cornstarch, potato starch (15g or less), sweet rice flour, arrowroot starch, etc)
1 1/2 tsp salt
3 Tbs sweetener (brown sugar, white sugar)
1 Tbs Bob's Redmill xanthan gum
*I highly recommend using a scale to measure flour, without a scale the flour/liquid ratio will vary. However if you must use cups, fill your cup a spoonful at a time and gently level with a knife. Assume 1 cup of the whole grain flour is 120g. 1/2 cup of starch is about 62g.
In stand mixer mix:
3 eggs lightly beaten (bring to room temperature by soaking in warm water)
1 tsp apple cider vinegar
1/4 cup oil (light olive oil, coconut oil, butter, etc. I usually use coconut oil)
1 Tbs sweetener (honey, agave, sugar, brown sugar)
add the yeast and flour mixture to mixer and mix for 4 minutes (I use a bosch mixer).
Scoop batter into a well greased pan with a spatula. Then with wet fingers smooth and shape the loaf. I like mine kind of rounded on top. I tried it with an indentation down the middle once, but the finished loaf looked like it had caved in. Put the loaf in the oven with the light on to rise until the loaf is about even with the top of the pan or "double" as most recipes say. The bread sometimes does nothing for 30 minutes and then starts rising like crazy. Sometimes it starts rising right away. I haven't figured out exactly how it works yet. Just watch close. If it over rises and the air pockets get too big it can fall after baking.
Bake at 375 for 10 minutes. Cover the bread loosely with foil and then cook 45 more minutes. Cool on a wire rack. The bread is better if you wait an hour to slice, but my kids usually talk me into slicing before that. When the bread is cool I slice the whole loaf at once so I can have convenient sliced bread the rest of the week.
I took some pictures of a batch I made of 12-grain bread. My oven isn't level, so you'll notice all my loaves lean a bit:(
Below: 12-grain bread with sunflower seeds, flax seeds, millet, and pumpkin seed add-ins,
shaped

after about 40 minutes, ready to bake.

after 10 minutes of baking, the additional rise during baking is very good, time to add foil.

All done, house smells heavenly!

First slice, yum!
Below: Multi-grain with quinoa-sprout add-ins


Left below: amaranth, brown rice, millet, oat loaf
Right below: quinoa, millet, brown rice, teff loaf

Below: the loaf I shaped with an indentation down the middle.
Left: amaranth Right:brown rice, teff

Sweet Sorghum Bread:
(quantitities to use in template)
60g Bobs Redmill sweet sorghum flour
60g millet flour
80g brown rice flour
40g teff flour
60g tapioca flour
65g sweet rice flour
1/4 C sunflower seeds
3Tbs white sugar
Golden Amaranth Bread:
60g amaranth flour
60 g millet flour
80g brown rice flour
40g gf oat flour (make flour in blender or coffee bean grinder)
62g tapioca flour
64g cornstarch
3Tbs brown sugar
Multi-Grain Bread:
inspired by King Arthur's multi-grain flour blend
40g each of the following: sorghum flour, quinoa flour, millet flour, brown rice flour, teff flour, amaranth flour, tapioca flour, cornstarch, and sweet rice flour.
white sugar
Quinoa-Millet Bread:
60 g quinoa flour
80 g millet flour
70g brown rice flour
30g teff flour
60g tapioca flour
66g cornstarch
brown sugar
I use a K-tec Kitchen Mill for my quinoa flour, millet flour, teff flour, and rice flours.
Thursday, August 8, 2013
Daisy Tula Petal: Women of Courage Gallery
A Daisy Scout earns a daisy petal and learns about what it means to be courageous by making her own gallery of women of courage, here is ours, the first page is from The Friend "women of faith"! We are going to color and cut them out and make a museum!


Thursday, July 25, 2013
Gluten Free Flour-Weight Conversions and Measuring 101
I adore recipes written in grams, its so much easier to duplicate results time after time! I've been using and loving this volume-weight chart for
awhile and it recently occurred to me to test its accuracy. I scooped the flours out of the bags with my measuring scoop and then leveled it off. I was stunned by how much variation there was from the chart.
Amaranth: 140g instead of 120g
Brown Rice: 148g instead of 158g
Cornmeal:150g instead of 128g
Millet: 172g instead of 120g
Oat flour: 88g instead of 120g
Pea protein powder: 144g (split pea flour is 160g)
Sorghum: 156g instead 127g
Sweet rice: 180g instead of 204g
Tapioca: 140g instead of 125g
Brown teff: 152g instead of 120g
(an average difference of about 30g per cup of flour from the standard!)
Problems:
1) Measuring 101: When a recipe calls for 1 cup of brown rice flour, it is asking for 158g. The proper way to measure flour is to sift first or spoon it out of the bag into the cup. (Don't scoop it out of the bag with your cup or tap the cup after you fill it like me.) Then level the flour with a straight edge. Even if you do this, you probably won't get exactly 158 grams, just something close. Volumetric measurement is really imprecise. It works for general cooking, but for baking mass is better.
2) Your flour may my be too fine or too coarse making it more or less dense than typical. I grind my own flour and it is superfine.
4) You don’t know the accuracy of the cups or flour texture
the author of your recipe used, you can only guess based on their level of
expertise as a baker. A less expert baker probably scooped their flour with the cup and will have higher flour weights per cup, around 25g. If you convert to mass you may be off by as much as 50g! If you're not sure about the recipe author's measuring technique, use cups and do not convert to grams using a chart.
5) If you add 1/4 cup of four types of flour like we often do in gluten free baking, you have four
chances to add slightly too much or slightly too little flour, you won’t notice
like you would with 1 cup of one type of flour.
You could be off by as much as 1/4 cup of flour per cup in the end even if your flour was nicely sifted!
What to do:
1) Look for recipes written in grams!
2) Use measuring cups if the recipe is written in cups and developed by a regular person at home it is probably closer than the weight conversion. Also, they most likely scooped their flour out of the container rather than spoon filling or sifting their flour, so do it that way.
3) Ask the recipe author about how they measure their flour and if their flour is a standard storebought flour (Bob's, King Arthur, etc), home ground, superfine, gritty, etc. If they have superfine home ground flour instead of storebought flour, their flour might be denser per cup by 10-20g.
3) Expect that recipes from professionals will be the most likely to convert well from volume to weight because they measure more accurately and often use store bought flours.
4) If adding small amounts of lots of different flours, be extra careful to make sure each flour addition is measured accurately. Look for recipes that have you blend the flour separately and then add one measurement of the blend, there is much less room for error.
Subscribe to:
Posts (Atom)